Firefox 4 - Amazing Stats
- Firefox 4 crossed 4 million downloads in 11 hours. Download Firefox 4 from here.
- Europe leads with 1.7+ downloads followed by North America, Asia and South America.
- IE9 another popular browser has been downloaded 2.3 million in first 24 hours.
- Following images shows download count across various regions at 9.00 PM EST.
Distributed load testing using Apache jMeter
This post is based on assumption that user knows basics of creating test cases using Apache jMeter.
There are limitations on the number of requests that can be simulated for load testing from a single machine. Distributed testing comes to the rescue. In a distributed setup there is one controller called master and number of slaves controlled by master. Distributed load testing can be tricky and may produce incorrect results if not configured correctly. Test results depends on the following factors.
Setup 1:
Setup 2:
It is obvious that setup 2 produces better results. Steps to create Amazon account and configuration EC2 instances can be found in another post on this blog.
i) Installed jMeter version is jakarta-jmeter-2.4
ii) jMeter Installed in /home directory
4. jMeter updates and aggregates the results from all slaves instantly which may consume heavy resources of master and may result in system halt for large scale load testing. Update /bin/jmeter.properties as shown below.
mode=Batch
num_sample_threshold=100
jMeter running with ‘Batch’ mode collects and aggregates the results if it exceeds the
num_sample_threshold value.
Specify slaves’ public dns name separated by comma.
remote_hosts=slave1_public_dns, slave2_public_dns
5. Navigate to /bin directory and start slave by running
jmeter-server
6. Navigate to /bin directory and start master by running jmeter.sh from bin directory as below.
jmeter
You may run jMeter with increased heap memory as shown below
JVM_ARGS="-Xms512m -Xmx512m" jmeter
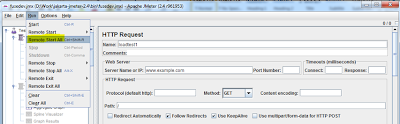
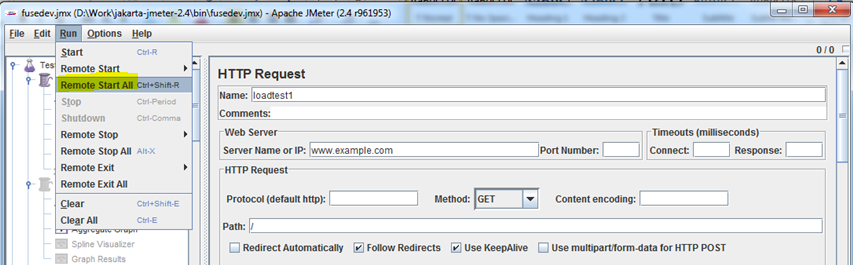
7. From jMeter user interface click ‘Run->Remote Start All’ as shown in the image below to start test case on all slaves.
8. After completion of running test cases shutdown all slaves from Run->Remote Stop All
9. You may shutdown Amazon EC2 instances from elasticfox. Right click on each instance and click terminate.
There are limitations on the number of requests that can be simulated for load testing from a single machine. Distributed testing comes to the rescue. In a distributed setup there is one controller called master and number of slaves controlled by master. Distributed load testing can be tricky and may produce incorrect results if not configured correctly. Test results depends on the following factors.
- Network bandwidth.
- Master and slave systems configuration including memory, processor speed.
- Configuration of the load testing tool like number of users running in parallel.
Setup 1:
- 1 Master controller - Quad Core 3.00GHz 8GB memory,
- 7 Slaves all with Intel(R) Xeon(R) CPU, E5420 @2.50GHz, 2.49 GHz, 2.00 GB of RAM
| Setup 1 |
- 1 Master controller an Amazon EC2 instance – Dual Core 2.6GHz 2GB memory
- 12 Slaves with similar configuration as Master
| Setup 2 |
- Following are the steps for load testing setup using Amazon cloud.
- Open elastic fox, a firefox plugin for managing EC2 instances. From the images tab in elasticfox search for ‘jMeter’. You may find existing EC2 instances for master and slaves. Alternatively you can create an instance of existing linux AMI with JDK installed and JAVA_HOME environment variable is setup. You can create any number of slaves from instances -> right click on slave instance ->Launch more of these.
- Download and install jMeter by unzipping the tar file to home directory (or any other directory) of master and slave instances.
i) Installed jMeter version is jakarta-jmeter-2.4
ii) jMeter Installed in /home directory
4. jMeter updates and aggregates the results from all slaves instantly which may consume heavy resources of master and may result in system halt for large scale load testing. Update /bin/jmeter.properties as shown below.
mode=Batch
num_sample_threshold=100
jMeter running with ‘Batch’ mode collects and aggregates the results if it exceeds the
num_sample_threshold value.
Specify slaves’ public dns name separated by comma.
remote_hosts=slave1_public_dns, slave2_public_dns
5. Navigate to /bin directory and start slave by running
jmeter-server
6. Navigate to /bin directory and start master by running jmeter.sh from bin directory as below.
jmeter
You may run jMeter with increased heap memory as shown below
JVM_ARGS="-Xms512m -Xmx512m" jmeter
7. From jMeter user interface click ‘Run->Remote Start All’ as shown in the image below to start test case on all slaves.
8. After completion of running test cases shutdown all slaves from Run->Remote Stop All
9. You may shutdown Amazon EC2 instances from elasticfox. Right click on each instance and click terminate.
Issues you may come across while configuring and using squid cache and possible solutions
1. PHP Warning: PHP Startup: memcache: Unable to initialize module
The issue is with the PHP version and memcache version mismatch. Install memcache
using following command.
using following command.
pecl install memcache
2. Error: Too few url_rewriter processes are running.
Verify following:
Verify following:
i) php cli is installed.
ii) make sure that "squid"(you can find the user name in squid.conf) user has permissions to
write and execute for redirect program (ex: redirect.php).
write and execute for redirect program (ex: redirect.php).
iii) update permissions for squid user /var/spool/squid/ if problem persists.
3. diskHandleWrite: FD : disk write error: () Disk quota exceeded.
Either try to delete crash reports such as "core.15" from /var/spool/squid or increase the disk
quota for the user or turnoff quotas in the worst case.
quota for the user or turnoff quotas in the worst case.
4. Too few url_rewriter processes are running
By default the number of url_rewriters in squid is 5 and the concurrency is set to 0. Increase the number of url_rewriters by adding following line in squid.conf usually found in /etc/squid/ directory.
url_rewrite_children 20 startup=2 idle=5 concurrency=2
url_rewrite_children - The maximum number of redirector processes to spawn. It can be
increased based on RAM and system capabilities.
increased based on RAM and system capabilities.
startup - Number of processes to spawn when squid starts.
idle - Minimum number of processes squid tries to keep available at all times.
concurrency - The number of requests each redirector helper can handle in parallel.
5. WARNING: url_rewriter # (FD ) exited
Edit php.ini file, there may be multiple php.ini files edit the one which your web server(for which squid is configured) is using and increase the socket timeout in php.ini (usually /etc/php.ini) file as below. By default timeout is 60 secs. You can disable timeout by setting value to -1.
; Default timeout for socket based streams (seconds)
default_socket_timeout = 100
Amazon EC2 instance setup
Creating an Amazon EC2 instance
Connecting to instance
- Install elasticfox plugin for firefox.
- Start elasticfox by clicking on the 'Tools' menu in Firefox then selecting 'Elasticfox'. Elasticfox will ask you to provide AWS Credentials, select 'Yes' at the first prompt then enter your AWS Account name, Access Key and Secret Access Key. Create or view your account's key by logging into amazon aws portal.
- Access key and Secret Access key can be found at Account->Security Credentials->Access Keys
- Once entered your Account Credentials click the 'Close' button. Check your access by Clicking on the 'Availability Zones' tab in Elasticfox. You should see several regions available. If you do not see any regions then close and restart Firefox and Elasticfox.
- Set up KeyPairs for the instances. These are used to connect to your AMI instance for administration purposes outside of Elasticfox. Click on the KeyPairs' tab, then on the Green, 'Create a KeyPair' button. Name the keypair (for example: mykey1) and then save the file.
- Start a small EC2 instance. Choose instance based on the functionality required. Click the 'Images' tab in Elasticfox then enter the AMI ID or enter any search term (ex: ingres)in the 'Images' text box. Click the AMI name to select it then click the 'Launch Instance' button.
- Accept default values and select the keypair just created. Click the 'Launch' button.
- Click on ‘Instances’ tab which lists all the instances under the account and the instance just created. The ‘State’ of the instance will show as pending for few minutes before going to running state.
- Double-click the instance from the ‘instances’ tab and copy the "Public DNS Name" entry.
Configure firewall settings
To change the security settings from Elasticfox on the 'Security Groups' tab.
- Create a new group or select the 'default' group in the left 'Your Groups' pane, and then click the 'Grant Permission' (green button) on the left side 'Group Permissions' pane of your browser window.
- To open port: (ex:1935) - choose 'HTTP' in the 'Protocol Details' dropdown, 'TCP/IP' as the Protocol and '1935' as the Port. Leave the 'Host' radio button selected and in the field next to it enter 0.0.0.0/0. Port 1935 will now be open in any new AMIs you launch in the 'default' security group.
- If port 1935 is already added in the group permissions it will prompt for error, on error prompt select ‘cancel’
- Click the 'Grant permission' button in the right pane.
- In the dialog box that appears select 'SSH' from the 'Protocol Details' drop down and 'TCP/IP' as the 'Protocol'. Leave the port as '22'. In the 'Host/Network Details' section enter 0.0.0.0/0 as 'Host' then click the 'Add' button.
- Click the ‘Grant permission’ button in the right pane.
- Choose 'HTTP' in the 'Protocol Details' dropdown, 'TCP/IP' as the Protocol and '8080' as the Port. Leave the 'Host' radio button selected and in the field next to it enter 0.0.0.0/0. Port 8080 will now be open in any new AMIs you launch in the 'default' security group.
Connecting to instance
- Download putty.exe and puttygen.exe.
- Run the puttygen.exe tool, click the “Load” button and select the .pem key file(If the pem is not listed in the directory select ‘All Files’ from the drop down) that is created and saved earlier, enter file name and click the “Save private key” button and save the key.
- Right click on the running instance in the Elasticfox and click ‘Connect to Instance’. Select the ‘.ppk’ file created in the previous step to open instance shell.
Subscribe to:
Posts (Atom)